
Fresh out of college, as a design engineer, I was running back and forth from the CNC machine to the office. Calipers, taps, thread gauges, scribes, all stuffed in my pocket. Behind the repair stand as a bike mechanic: pedal wrenches, 3 ways, drivers, side cutters, and all manner of hardware distributed amongst my jeans. When I am welding, the anti spatter spray, wire brush, slag hammer, file, are all strewn about hopefully near where I am working. Sewing is no different, snips right by the machine, or wait, is that where I put them? Where the hell did my sharpies go?
My life has had me constantly moving around with my tools, yet I only ever wore an actual toolbelt when I was working with my dad on framing, drywall, siding, or what have you. So a couple of years ago, I saw a little tool pouch online made by the Holstery, and I picked it up. While it was an awesome addition, It was missing a lot of small features I liked, so I decided to make my own.

An evolution of prototypes
It started very simply with a small pouch that I could test a bunch of features I was missing. On the first few bags I used 1680D Ballistic Nylon with ripstop liner, then some simple belt loops to slide it onto my belt. The above image shows the first prototype on the left, then in order to the most recent style on the far right.
One or more of these ended up following me around with just about everything I was doing. I especially liked using them for work where I was regularly swapping between various hand tools, like bike work and metal fabrication. I even found myself using the bigger one (middle right) for a different lens to quickly swap to when I was out shooting, albeit with a padded insert.
So with the testing complete, and the feasibility tested, I decided to tackle pretty much the only gripe I had: how they attached to my belt.
As mentioned, my quick solution was that I would feed my belt through the loops on the back. Since my preferred spot for these bags to sit was at my 4 o'clock, or at my 8 o'clock, that is, just behind my side - it meant having to almost fully remove my belt in some cases when I was putting them on. While not super inconvenient, it was just annoying enough to want to fix it.
I experimented with some premade belt clips, the type you'd see on the side of a tape measure, but it often made the pouch floppy and not very secure. I ended up at a design built of two 3D printed parts, a backing plate, and a belt clip. The two of which would be held together either with rivets, or binding screws. This was the ticket, it allowed me to slide it on and off my belt with ease, and had enough positive spring that it stayed firmly attached even with a lot of weight.
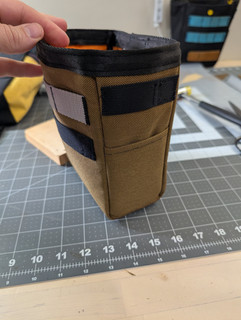
The construction of the newest pouch, pictured below, is as follows:
Exterior
1000D Cordura
Milspec Nylon Webbing
Elastic Webbing
Seatbelt webbing (for the rim)
Interior
210D Hexgrid Ripstop Nylon
1000D Cordura
Internal Structure
HDPE Plastic Lining
Pellon Ultrastiff 70 Interlacer
Plastic Belt Clip System
PLA


My ultimate goal is to build an entire tool belt ecosystem with this basic premise, and make all sorts of attachments that can help with a variety of projects, from pouches to drill holders and beyond.

It also holds snacks at an optimum position for munching while working.
Below I have a link to the STL file for the Belt Clip assembly and the GCode if you want to go straight to printing it with PLA.
Comentarios